


Important! Always turn off and disconnect the appliance from the power supply before changing the filters, cleaning, or carrying out maintenance procedures
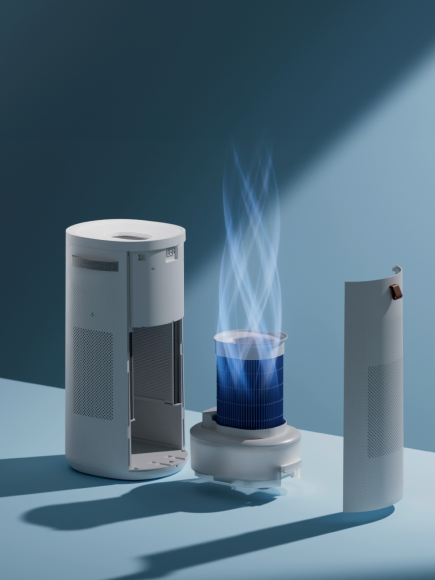
Step 1: Remove the Pre-Filter
- Gently pull off the pre-filter fabric that wraps around the unit. This exposes the main filter underneath.
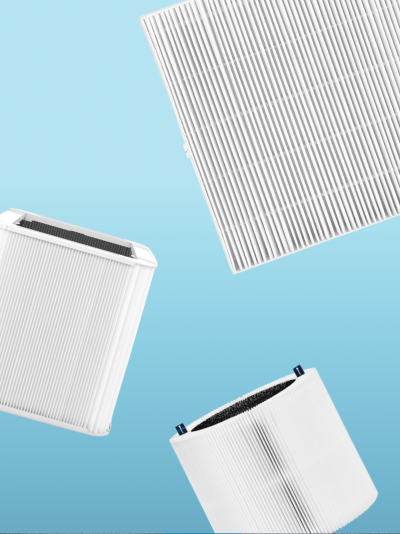
Step 2: Unlock and Remove the Old Filter
- Locate the filter connector latch and pull it open to unlock.
- Slide off and discard the old filter (Note: filters are not washable or reusable).
Step 3: Wrap and Attach the New Filter
- Take your new filter and wrap it around the body of the air purifier.
- Make sure the arrow printed on the filter is pointing up.
- Reconnect the filter latch to secure it in place.
Step 4: Reattach the Pre-Filter Fabric
-
Pull the fabric back over the filter, ensuring it fits snugly and the Blueair logo tag is at the top.
Step 5: Power On and Reset Filter Indicator
- Plug in and turn on the purifier.
- Press and hold the Fan Speed button for 15 seconds to reset the filter replacement indicator, OR use the Blueair app to reset it from your device page.